Guide
Share a chatbot that knows your stuff
Teach a chatbot your documents and web pages, then give anyone a link. This guide takes you from a new account to a shared bot, step by step.
Overview
Create a free account
You start a free 3-day trial of everything, with 4M starter tokens. End users to your bot never need an account.
Make a bot and teach it
Upload files, add web pages, paste text or write questions and answers. It learns each one as you add it.
Choose what it can do
An information bot that answers only from your knowledge, or a general assistant. Chat only, or chat with a voice. Let end users send files, or not.
Share the link
Send it, or paste the embed code into your site, Storyline, Rise or your LMS. Your tokens pay for what end users do, up to the budget you set.
First time here
The first time you open My bots, a short tour points out the important parts: the New bot button, your list of chatbots, your tokens and the theme. It takes under a minute and you can skip it. The tour runs once. To see it again whenever you like, choose Take the tour at the bottom of the side list (or at the end of the menu on a phone), or the small link under the My bots heading; on a bot, the Guide link beside the Live switch replays that bot's tour.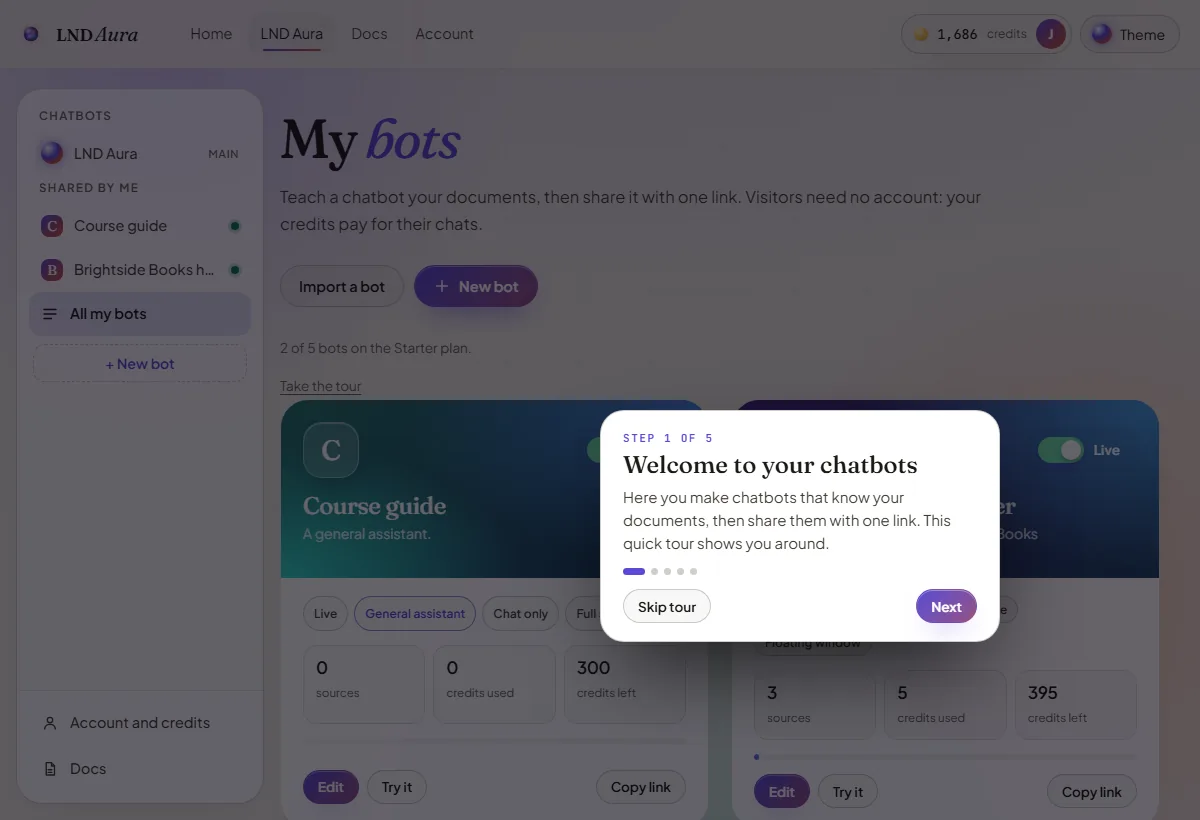
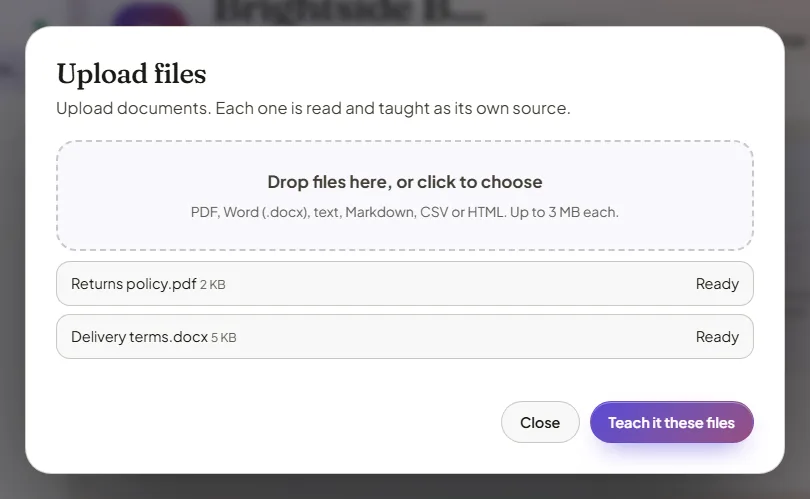
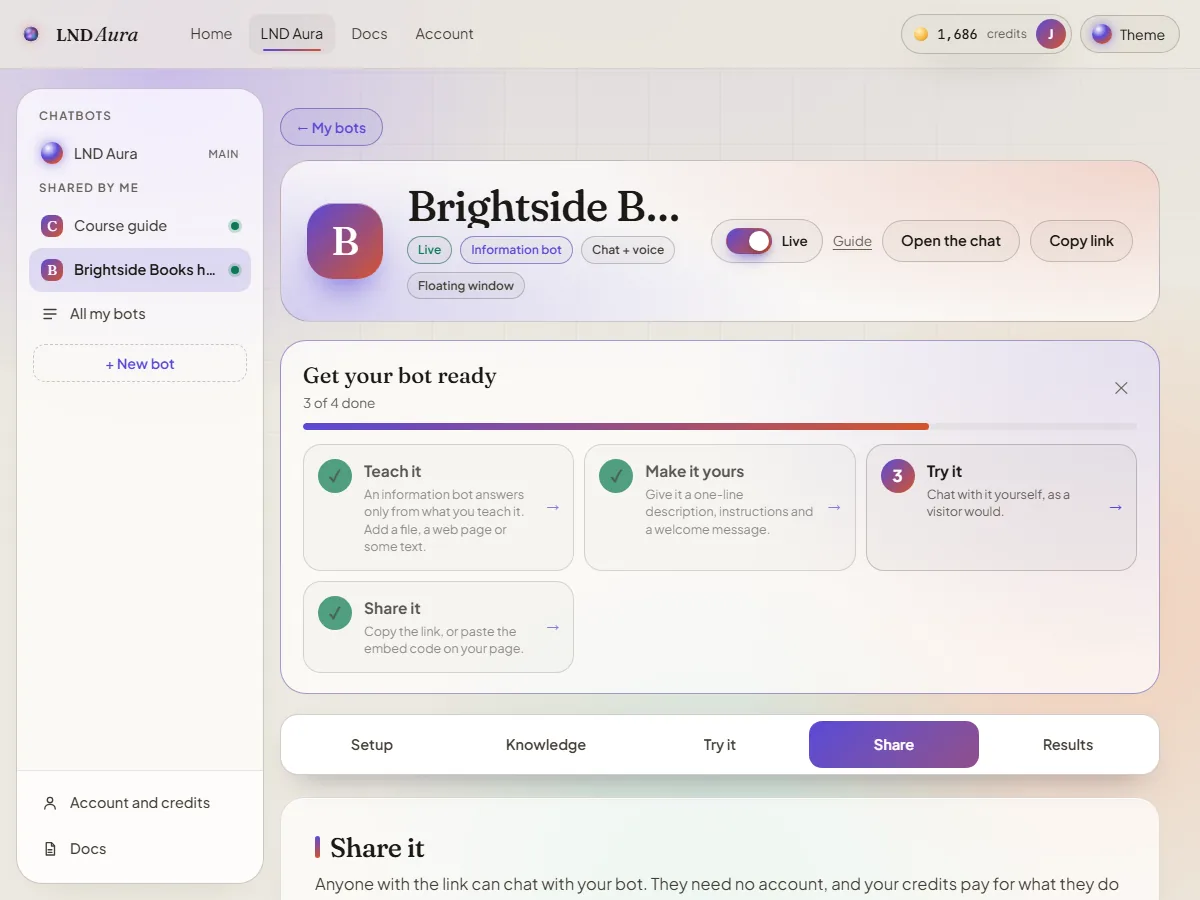
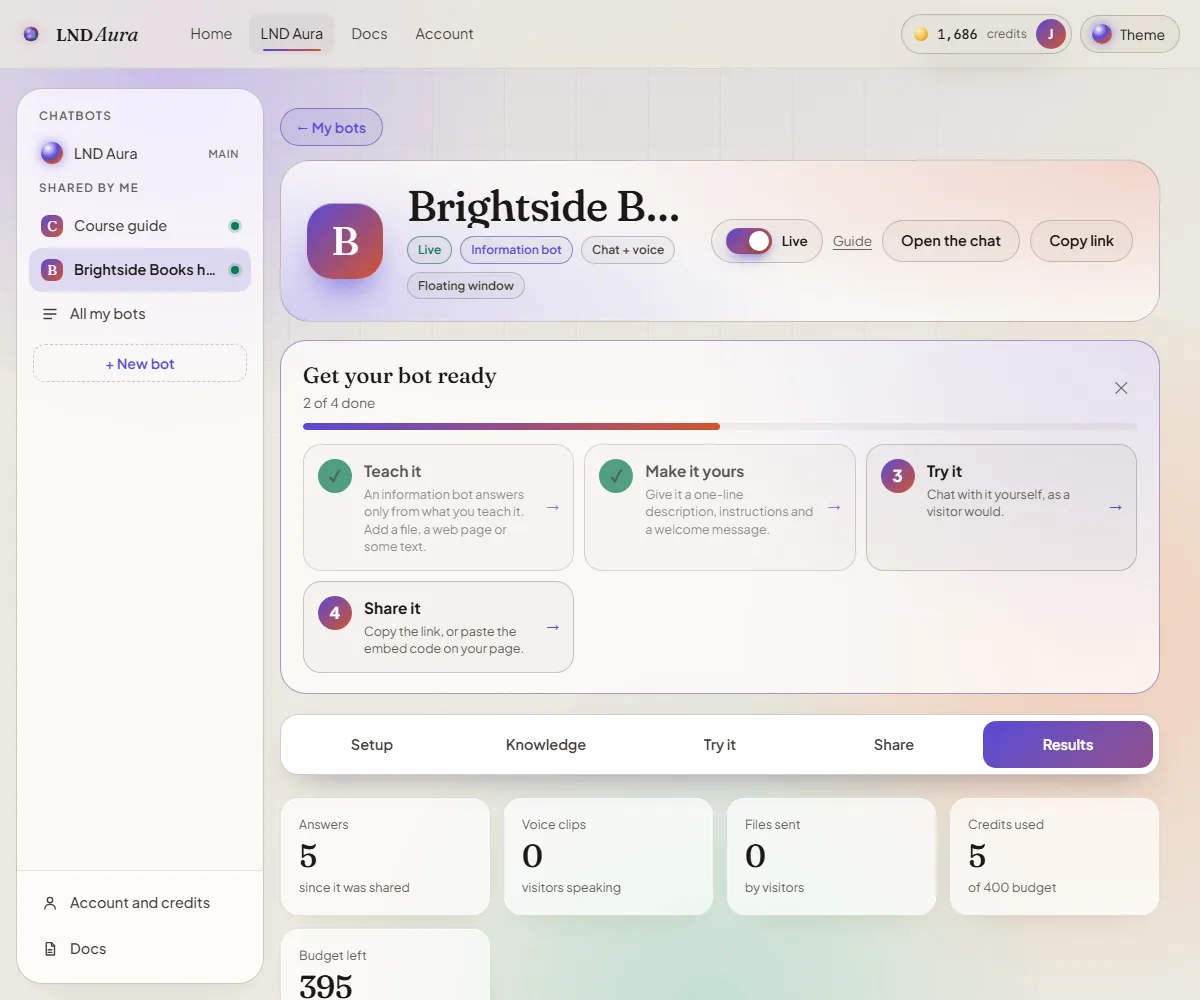
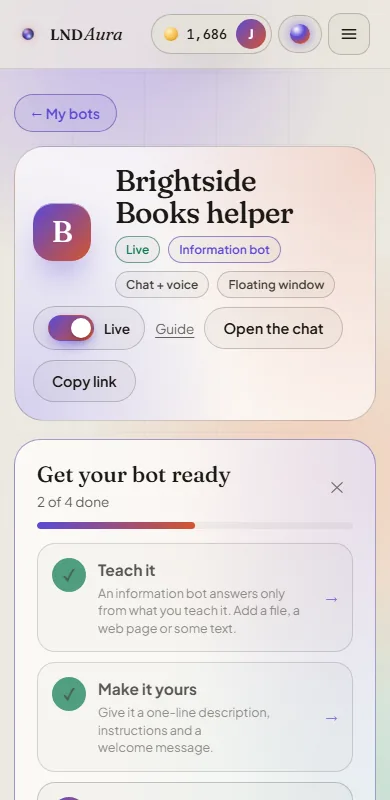
Every bot you open has a Get your bot ready checklist at the top, so you always know what is left:
Teach it
Add a file, a web page, some text or questions and answers. An information bot needs this; for a general assistant it is optional.
Make it yours
Give it a one-line description, instructions and a welcome message.
Preview it
Chat with it yourself on the Preview tab, as an end user would.
Share it
Copy the link, or paste the embed code on your page.
Each step ticks itself off as you go, and you can click any step to jump to the right tab. When all four are done the list says your bot is ready, then tucks itself away. Use the Guide button at the end of the bot's top row to run the bot tour again.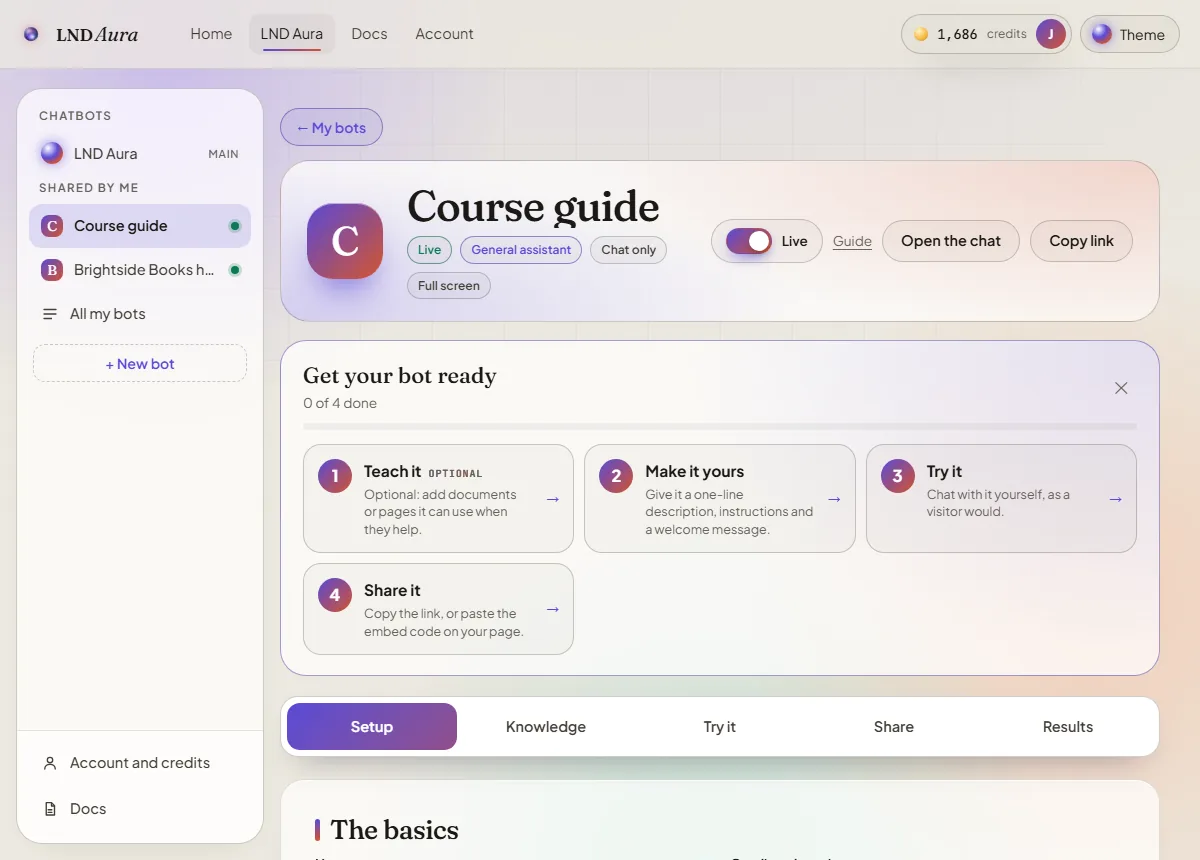
1. Your account
Create it
Choose Sign up in the top bar. Enter your name, email and a password (at least 8 characters, with a letter and a number). Your 3-day free trial starts, with 4M starter tokens.
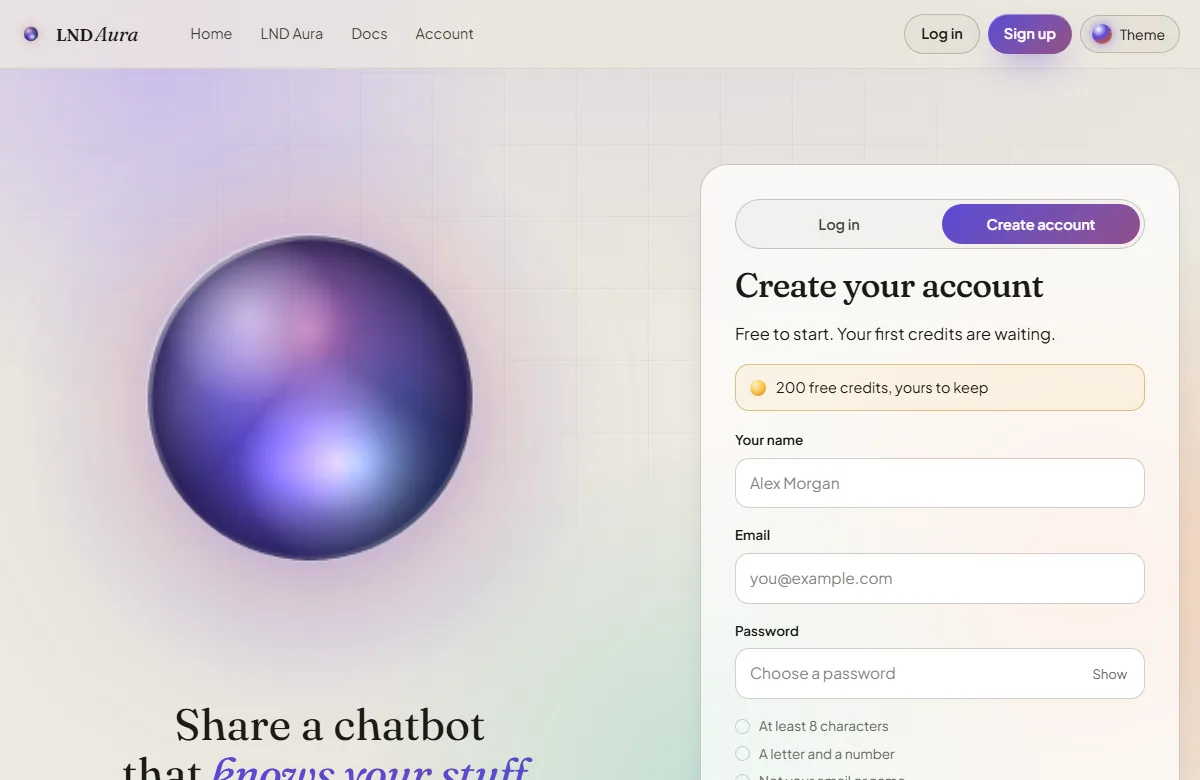
Sign up: a name, an email and a password. Log in and out
Choose Log in and enter your email and password. This browser remembers you for 30 days. Log out is in the menu under your tokens, and it always asks first. After 8 wrong passwords the account is locked for 15 minutes. Resetting a forgotten password by email is not available yet.
Your tokens
The number next to your picture is your balance. Click it to see your plan, your monthly tokens and your top-up tokens, and to jump to your bots or account page.
Your chatbots list
When you are logged in, a list on the left (on a phone, the Menu button at the bottom left) shows every bot you made, with a coloured dot (green is live). Click one to open it and preview it straight away; All my bots and + New bot are underneath. Account and tokens, the tour and these docs are at the bottom.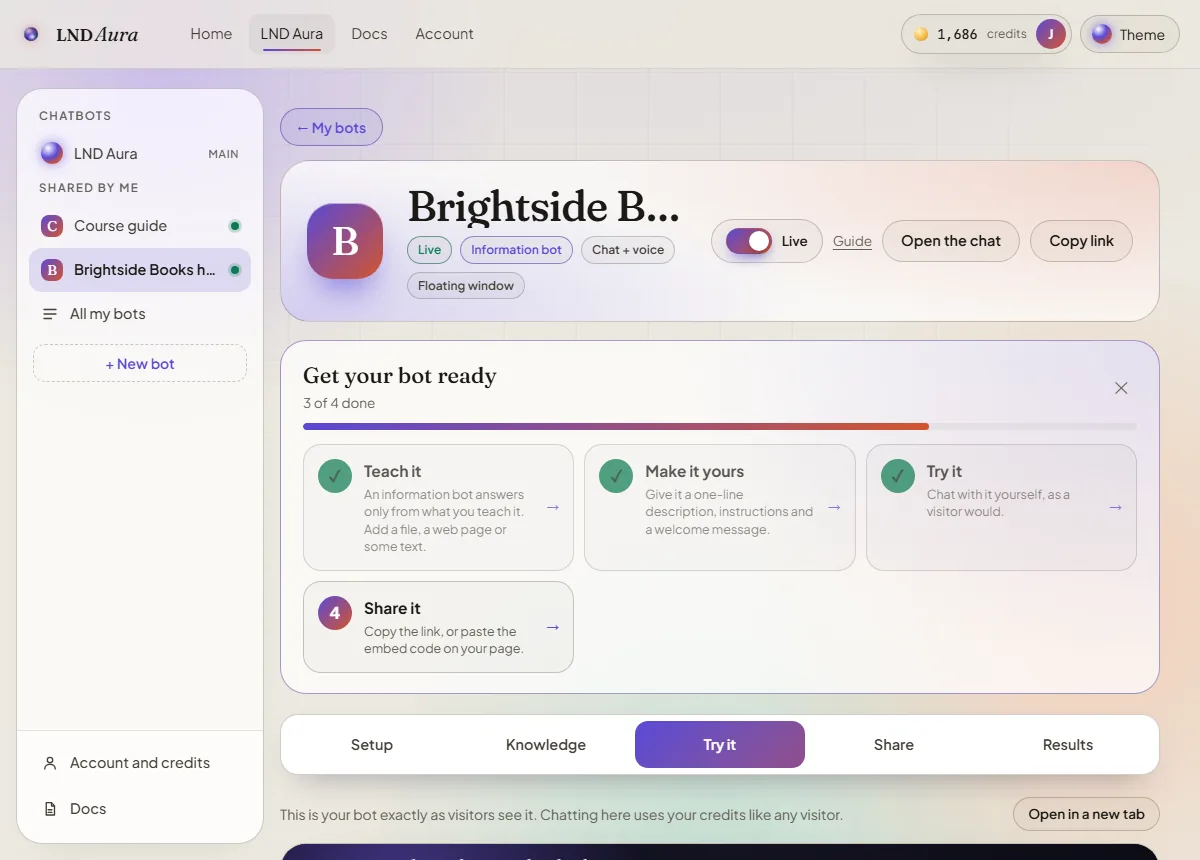
2. Make a bot
Open My bots and choose New bot
Give it a name and choose the kind.
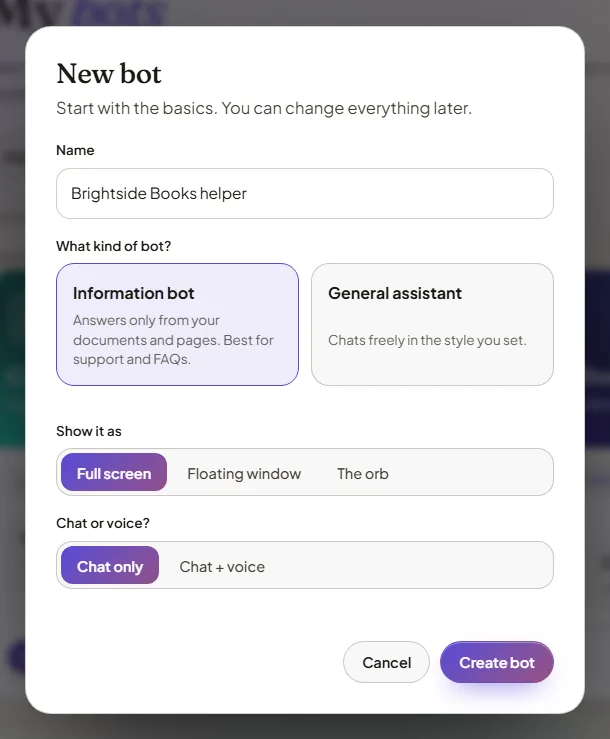
The new bot window. Information bot or general assistant?
Pick Information bot if people should get answers only from your documents (a help desk, a course guide, a company FAQ). Pick General assistant if it should chat freely in a style you set, and use your documents only when they help.
Share it as a full window
Your bot opens as a full window page: best for a link in an email, a course or a QR code. Want a floating chat over your content? Put the link in a web object in Storyline 360 and build your own floating window around it.
Chat only, or chat with a voice?
Voice lets end users talk to the bot and hear it answer. It costs more than chat: an end user speaking costs 60,000 tokens for every 15 seconds, and hearing the answer costs 160 tokens for every character spoken (300 with the HD voice), on top of the answer itself. Choose it only if people need it. The window shows how many tokens one end user message will use for the options you picked (typed, with a file, or spoken), and it updates as you choose. You can change this later.
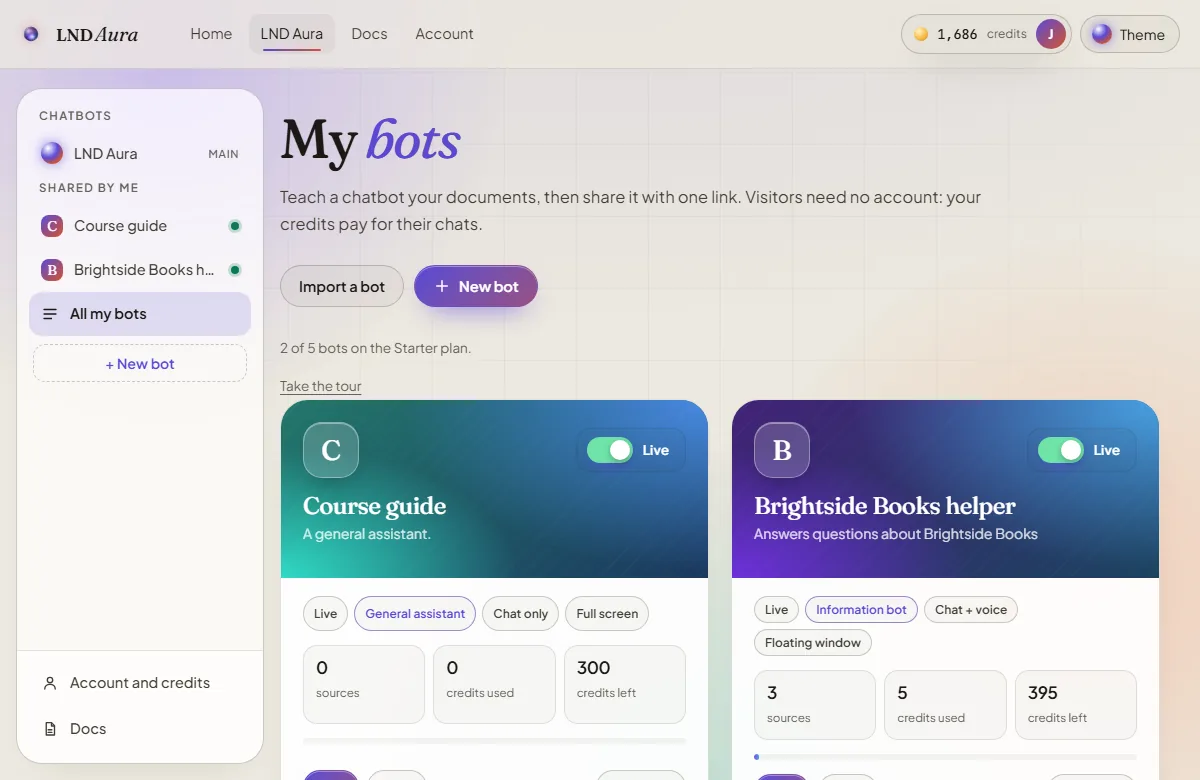
Your bots appear on the My bots page, each with its state (Live, Switched off, Budget used, or Needs knowledge), its kind, and the tokens it has used.
3. Teach it
Open the bot, and on the Build tab choose Information bot. A Knowledge section opens right under it. The bar at its top says whether it is trained and ready. Choose how to add things:
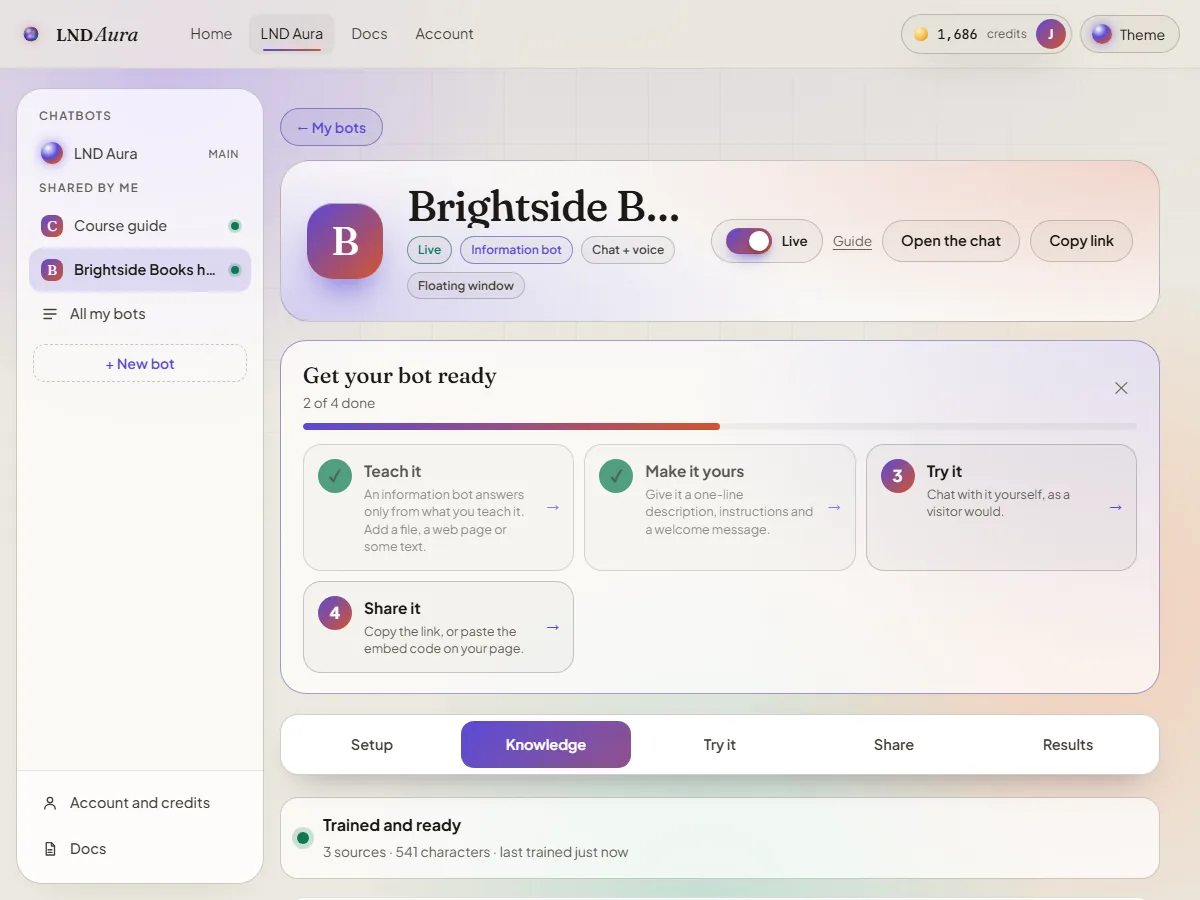
- Upload files. PDF, Word (.docx), text, Markdown, CSV or HTML, up to 3 MB each. Drop several at once; each becomes its own source.
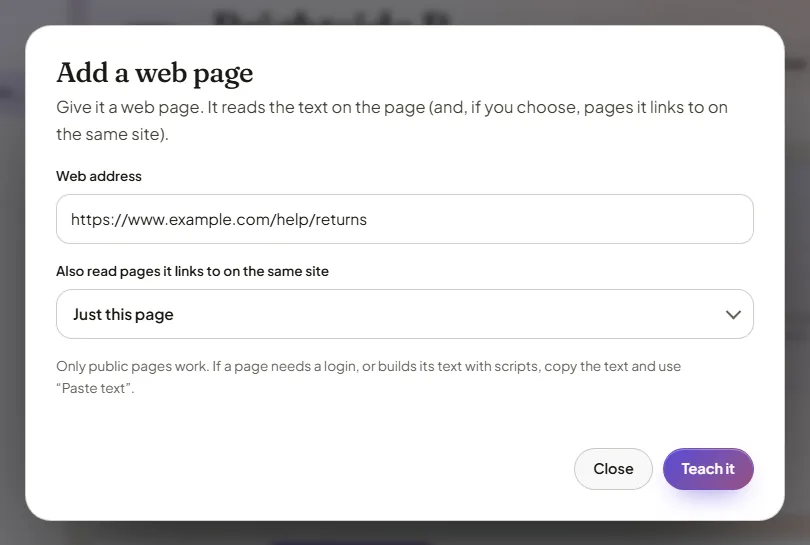
- Add a web page. Paste an address. You can also have it read pages that page links to on the same site (up to 12). Only public pages work: if a page needs a login, or builds its text with scripts, copy the text and use Paste text instead.
- Paste text. A policy, a price list, notes. Give it a title so the sources tag is clear.
- Questions and answers. Write the questions people ask and the answer you want given. These are the most reliable.
How it learns
Each source is read, split into passages of about a paragraph, and indexed by meaning. When someone asks a question, the bot finds the best passages and answers from them. End users never change what it knows.
Looking after it
- View shows the text it learned from a source, so you can check it.
- Refresh (web pages) reads the page again, after you change it.
- Remove makes it forget a source.
When a source has been learned you get a green notice saying what was added (characters, passages and tokens used), and the new source is highlighted in the list for a moment. Teaching costs 375 tokens for every 1,000 characters (about 3,750 for 3 pages). Your plan sets how many sources and how many pages of knowledge a bot may hold.
4. Set it up
On the Build tab, change anything. A bar appears at the bottom saying you have unsaved changes, with Save changes and Discard. When you save, your link shows the change straight away, and the bar offers Open the link so you can see it.
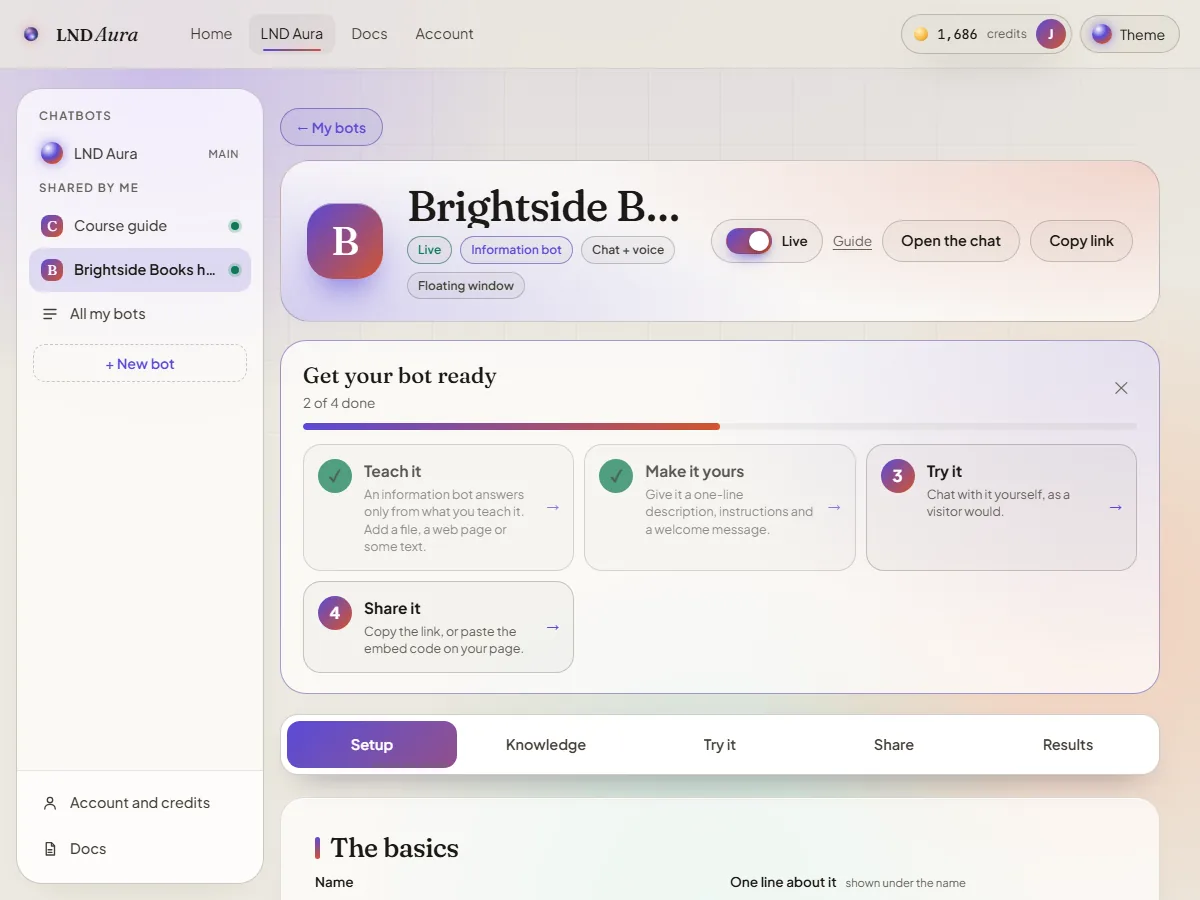
- Instructions. Who it is and how it should talk, for example: “You are the friendly assistant for Brightside Books. Keep answers short and practical.”
- Welcome message and suggested questions. End users see the welcome message first, and up to 4 suggestions they can tap.
- When it does not know. What an information bot says when the answer is not in its knowledge. Nothing is charged for that reply.
- Chat or voice. For voice, pick one of four voices and Standard (clear, 160 tokens a character spoken) or HD (richer, 300 tokens). The tokens show next to each choice as you pick.
- What end users can do. Let them attach a document or picture to ask about it (it is read for that chat only and never added to your knowledge), and choose whether to show which sources an answer came from.
- How it appears. A full window page. Build a floating window in Storyline 360 if you need one.
- Look. Choose Dark or Light, then a colour: Violet, Amber, Teal or Azure (a flat, professional look). A live preview beside the choices shows your bot as end users will see it, and updates as you change the name, welcome message or theme.
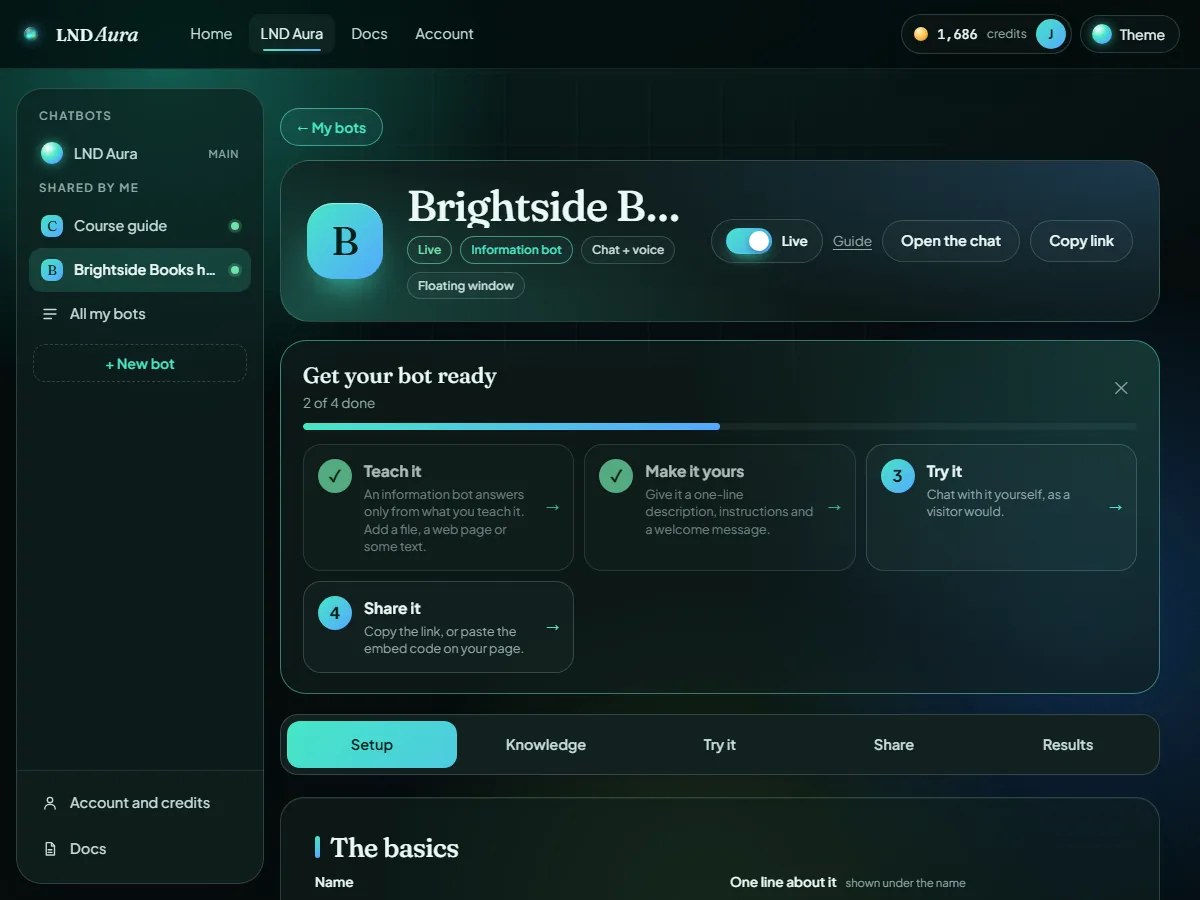
The look picker, with a live preview next to it. - Budget and limits. The most tokens this bot may use in total (set in millions of tokens), and an optional number of answers per day. When the budget is used up, end users see that the bot is unavailable. On Pro you can also hide the small “Powered by LND Aura” badge.
- Live switch. The switch at the top of the bot, and on each card in My bots, turns it on or off straight away. Off pauses it: the link stays the same and end users see that it is switched off.
5. Share it
The Preview tab shows your bot exactly as end users see it, so you can test it first. Then open the Share tab, copy the link and send it to anyone: there is nothing for them to sign up for.
Put it on a website, Storyline or Rise
Copy the embed code. For a full screen bot it is a frame you paste where the chat should appear (an embed block, any page that accepts an iframe; in Storyline use the link in a web object). For the older floating window or orb styles it is one line you paste once on your page: a small button or orb appears in the corner and opens the chat. The microphone is allowed for voice bots.
What end users see
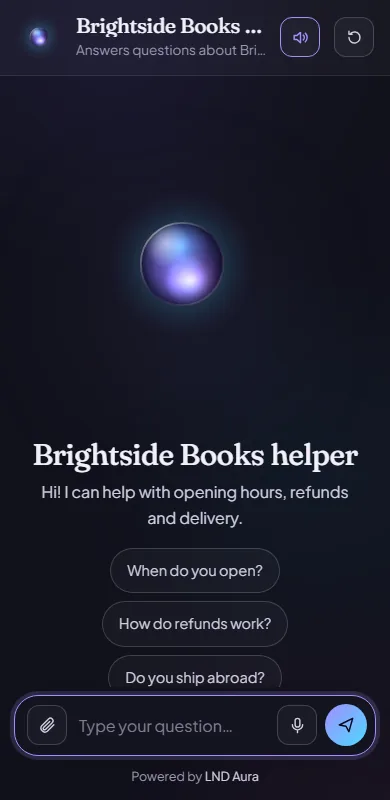
A clean chat with your name, description and welcome message, your suggested questions, and, if you allowed it, buttons to attach a file or picture and to talk. The round arrow at the top starts a new chat, and it first warns that the conversation on screen will be cleared.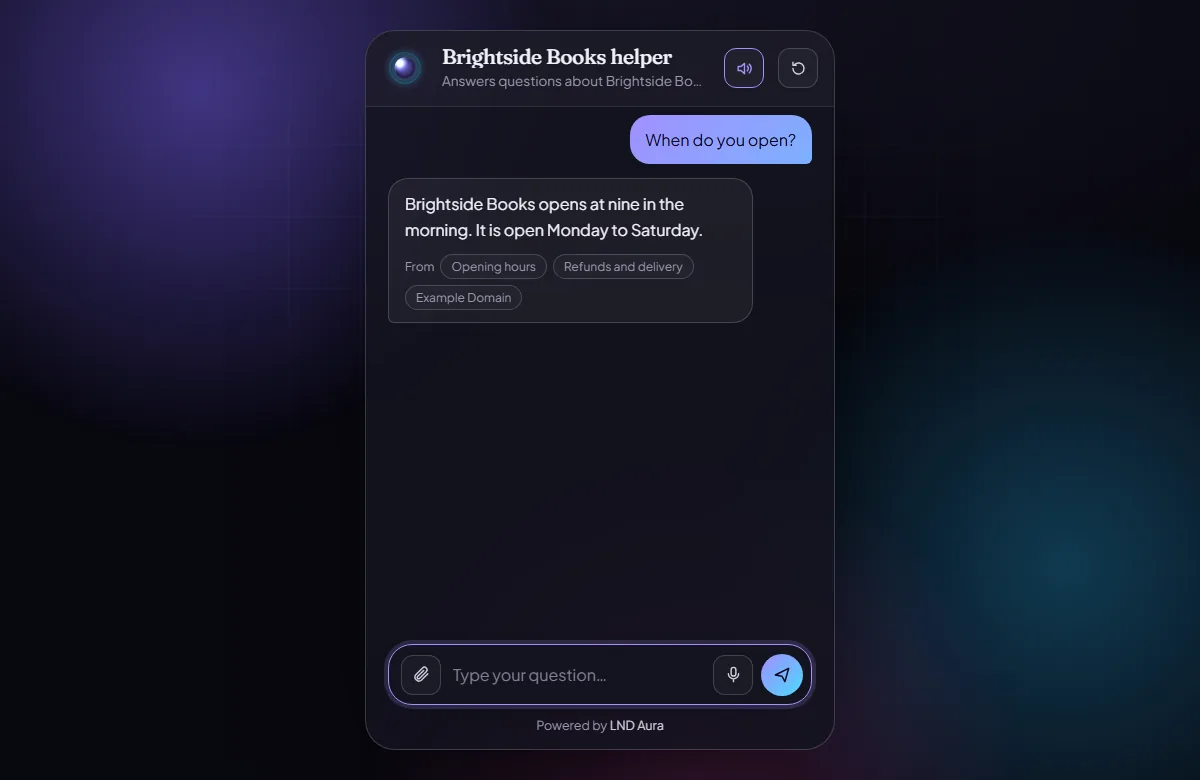
6. See how it does
The Results tab shows answers, voice clips, files sent, tokens used and the budget left, with a 14-day chart. Below it is a list of questions it could not answer: add that knowledge and it gets better. It never shows who asked.
On your phone
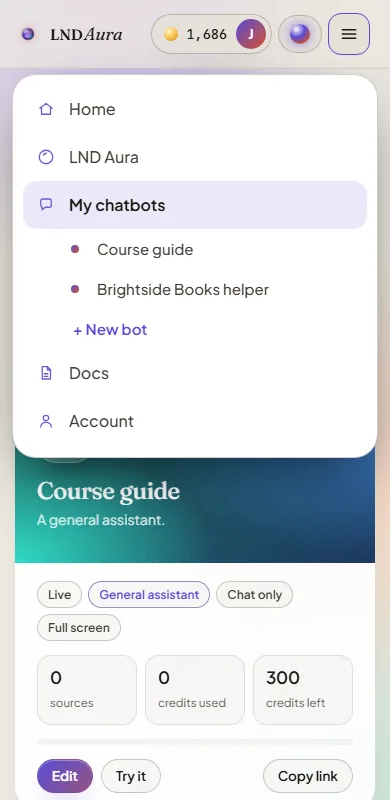
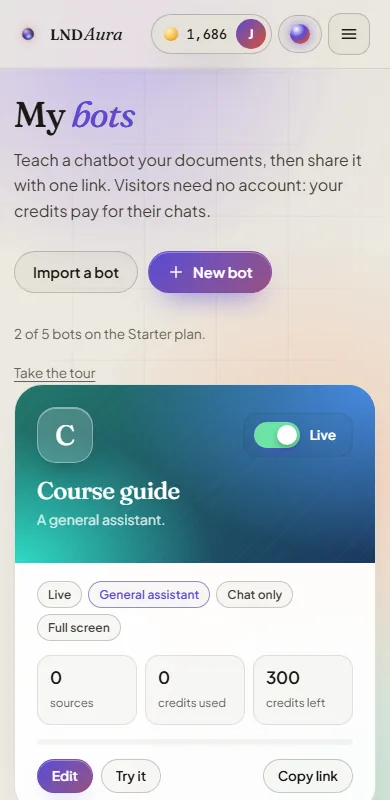
Everything works on a phone, with the same steps. The difference is where things are: the side list becomes a menu button at the top right, next to your tokens and the theme orb.
Open the menu
Tap the menu button. You see My chatbots with every bot you made listed under it, and + New bot, then Docs and Account. Tap anywhere outside, or press a link, to close it.
Make a bot
Choose + New bot, name it, pick what kind and how it appears, and create it. The checklist at the top of the bot tells you what to do next.
Teach and set it up
The four tabs (Build, Preview, Share, Results) sit side by side and scroll sideways if they do not fit. Adding a file uses your phone's file picker, and pictures from the camera also work for end users.
Preview it and share it
Open Preview to chat, then Copy link and paste it into a message. End users get the same page, sized for their phone.
Tokens and prices
| What happens | Tokens |
|---|---|
| An end user gets an answer (charged by its real size) | about 1,100 for a typical one |
| An answer about a file the end user sent | about 4,600 with a 12,000-character file |
| An end user sends a file (it is read) | 0 (the answer pays for the text it reads) |
| Voice in: every 15 seconds an end user speaks (a shorter clip counts as one) | 60,000 per 15 seconds |
| Voice out, Standard voice: every character spoken | 160 |
| Voice out, HD voice: every character spoken | 300 |
| Teaching a source | 375 per 1,000 characters |
| “I could not find that” from an information bot | 0 |
Your tokens pay for all of it, from your monthly tokens first, then your top-up tokens. Monthly tokens renew on the 1st and do not carry over; top-up and gift tokens never expire. If a reply fails before it starts, the tokens go back.
Plans
One subscription covers all four LND builders: LND Aura (chatbots), LND Infinity (courses), LND SimLab (scenarios) and LND Motion (interactive motion graphics). The free trial, Pro and Lifetime all give access to every one of them. Enterprise is a custom plan for teams, arranged with us. The limits in this table are for LND Aura.
| Plan | Tokens | Bots | Sources per bot | Knowledge per bot | Backups |
|---|---|---|---|---|---|
| Free trial, 3 days, all four builders | 4M to start, once | 1 | 5 | about 50 pages | None |
| Pro, $49 a month or $489 a year | 100M a month | 100 | 300 | about 1,670 pages | Export and import |
| Lifetime, $999 once (first 100 only) | 100M a month | 100 | 300 | about 1,670 pages | Export and import |
| Enterprise, custom | Sized to your team | As many as you need | As many as you need | As much as you need | Export and import, with invoice billing and priority support |
- The free trial lasts 3 days. It gives you every builder with the limits above. It has no backups, and your work is not kept after the trial unless you choose Pro or Lifetime before it ends. When the trial ends your bots stop answering end users, and you cannot create or change anything until you choose a plan.
- Yearly Pro is $489, which saves you $99 compared with paying monthly (about 2 months free). Switch between monthly and yearly with the toggle on the Plans section of the Account page.
- Lifetime is a single payment of $999 and is sold to the first 100 customers only. It starts only when you choose it, and the Account page shows how many are left.
Plan changes and top-ups are in test mode for now: tokens are added and the price is shown, but no money is taken yet. Find them on the Account page.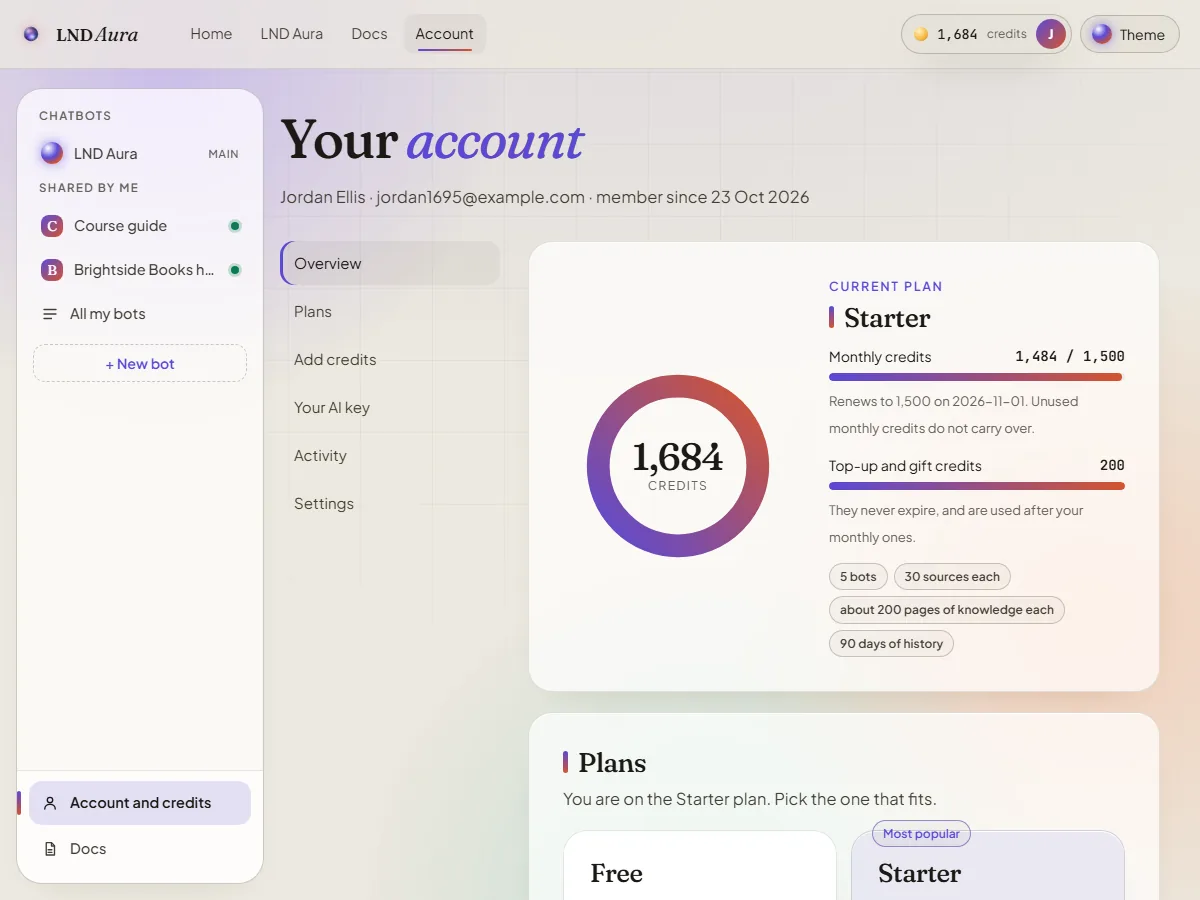
Your own AI key
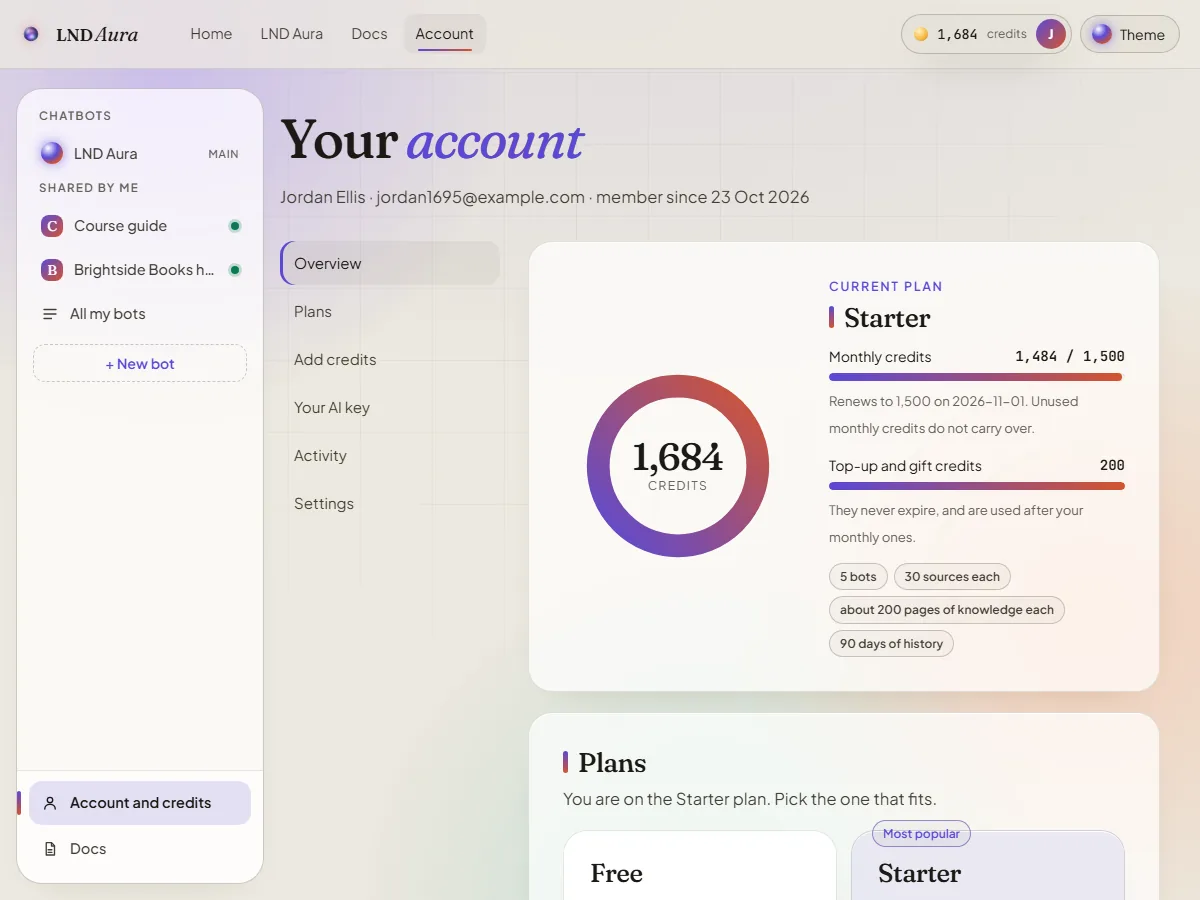
If you have a key from Google Gemini, OpenAI or Anthropic, add it on the Account page under Your own AI key. It is checked when you save it, kept encrypted, and never shown again (only its last four characters). Your shared bots then answer with it, so answers cost you no tokens and the provider bills you directly. Voice, teaching and files still use tokens. Remove the key and the bots go back to using tokens. (Pictures sent by end users are read only with a Gemini key or ours.)
Export, import, delete
- Export and Import are your backups, and are part of Pro and Lifetime (the free trial has none). Export (Build tab, at the bottom) saves the bot's setup and the text of everything you taught it as one file.
- Import (My bots page) makes a new bot from such a file, on this account or another. It teaches the knowledge again, so it costs the usual teaching tokens.
- Delete asks you to type the bot's name, then removes the bot, its link and everything it learned. Deleting your account removes all your bots too.
Questions
Do my end users need an account?
No. They just open the link.
Are end users' chats stored?
Not by us. A chat stays in the end user's own browser. You see totals and the questions the bot could not answer, never names or whole conversations.
The bot says it cannot find something I taught it.
Use the View button to check what it read from a page: contact details in a footer or header are read, but text a page builds with scripts is not. Check the source with View, and ask in words close to the text. If the answer is spread over a long page, add a short question and answer for it. Scanned PDFs (pictures of pages) cannot be read: paste the text instead.
A web page could not be read.
It may need a login, block automated readers, or build its text with scripts. Copy the text and use Paste text.
The bot says it is unavailable.
Its budget may be used up, it may be switched off, or you may be out of tokens. Open the bot to see which, then add budget or tokens.
Can it get things wrong?
Yes, like any AI. Information bots answer only from your knowledge and show their sources so people can check. Keep your knowledge current.